Powered by Squarespace
Contact

contact:

This form does not yet contain any fields.


    Sunday
    Jun072009

    Vivitar Ultra Wide & Slim Low Cost Lomography


    These are photos from the first roll of film run through our Vivitar Ultra Wide & Slim. The camera has a very nice look to the images, exhibiting a good vignette, and nice plastic camera characteristics that one would expect from a good toy camera. It uses the cheaper and easier to get processed 35mm film. If you are looking for a inexpensive introduction into the world of plastic cameras, consider this one.

    This roll of film was also used to test the film to digital CD option at the local drugstore. Many 1-hour labs offer this service for only a few additional dollars. By skipping the prints and only getting the film processed and transferred to CD, it will cut the processing charges down. It was very simple to load the CD and upload the images to the website.

    More photos from this camera can be seen on Flickr:
    http://www.flickr.com/photos/kaiy/sets/72157619288479623/


    While Vivitar is no longer making these, you can find the Black Slim Devil, a Superheadz clone at the Four Corners Store for $30US. If you are patient, you can do what we did, and keep an eye on your local thrift store and pick one up for a few dollars.

    There's also a nice little fish-eye lens accessory available for this camera, also at the Four Corners Store.
    Thursday
    May212009

    Video: An Experiment in Time Lapse Photography


    This isn't quite plastic, but fun anyways. I was playing around with my Nikon D40 and iMovie HD to make a time lapse movie of some stills I shot. I used Garage Band to slap together the "soundtrack".
    Saturday
    May162009

    Twitter

    Yes, I'm on twitter now. If you would like to follow what's new on the blog and youtube channel, you can follow me:
    http://twitter.com/kaiphoto
    Sunday
    May102009

    Video: Shooting with Diana


    Taking photos with your Diana+ is easy.

    Your camera prefers a fast film, so be sure to get film with a rating of ISO 400. ISO is the measure of how sensitive your film is to light. The higher the number, the more sensitive the film is to light.

    Slower films can be used, but you will have to adjust the aperture (Sunny,Semi-cloudy, Cloudy, P) accordingly. This just means, that if you are using a slower film, like ISO 200 or 160, that you use the Semi-cloudy or cloudy aperture when it is sunny out. These apertures have larger openings and will allow more light to hit the film, compensating for the slower film.

    Think SAFE!

    S - Shutter setting. For normal outdoor photos, set the shutter to N.

    A - Aperture setting. Set the aperture to the appropriate symbol, depending out the lighting conditions.
    Sunny
    Semi-Cloudy
    Cloudy
    P (Pinhole) If you accidently have your camera on pinhole, your negatives will be very underexposed using the N shutter setting, so nothing will come out.

    If you are shooting with a slower speed film (ISO 200 or 160), you will need to adjust the aperture accordingly.
    If it is Sunny outside, choose the Semi-Cloudy aperture.
    If it is overcast, choose the Cloudy aperture.

    F - Focus setting. Determine how far you are from your subject and set the lens to the appropriate distance.

    E - Expose your film by tripping the shutter lever.

    Wind the film to the next frame # in the counter window, and repeat.
    Tuesday
    Mar312009

    Thrift Store Find: The National Geographic Binocular Camera

    National Geographic Binocular Camera


    National Geographic Binocular Camera

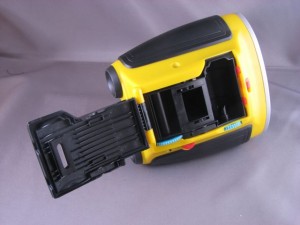
    This is a the National Geographic Binocular Camera that I found at a thrift store. It is a cheap plastic camera, with a 35mm half-frame camera built into the top of the binoculars, using a mirror to capture the image from the center optic between the binocular lenses.

    I haven't run a roll of film through it yet, but I plan to soon.