Powered by Squarespace
Contact

contact:

This form does not yet contain any fields.


    Tuesday
    Oct082013

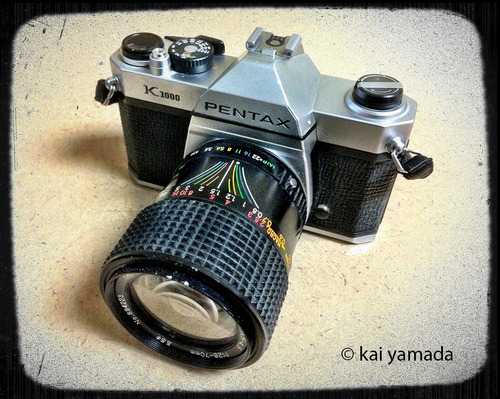
    Thrift Store Find: Pentax K1000 with a 28-70mm Zoom Lens.

    This is a thrift store find. It's a Pentax K1000 with a 28-70mm zoom lens (f/3.4-4.5). The lens has no identification other than it's specs so I'm it is probably not an original Pentax lens. I will have to do a little research.

    Other than a few dings on the filter mount ring, it's in good condition and seems to be fully operational.


    It came without a lens cap, so the battery was dead. The Pentax K1000 has no on-off switch for the light meter. It turns "off" when you put the lens cap back on.

    Battery Test for Pentax K1000:

    Testing the battery on the Pentax K1000 isn't obvious. There is no switch or button.

    To test the battery, set the ISO-ASA setting on the dial to 100.

    Set the shutter speed dial to B (bulb setting).

    Look through the viewfinder and look at the light meter needle on the right side. If the needle is in the up position and steady, the battery is good. If it is not, then replace the battery. The camera uses a 1.5v SR44 silver oxide battery or an equivalent. The LR44 battery is cheaper, but I don't recommend them, because they may leak and damage your equipment. I figure spending a little more money on the silver oxide battery is the better investment, because they last much longer than the alkalines and are lower risk for damaging the camera.

    The battery compartment is on the bottom of the camera.


    Sunday
    Sep082013

    Olympus XA4


    The Olympus XA4 is the wide angle version of the Olympus XA compact 35mm film cameras.It sports a 28mm lens vs the 35mm lens of the other XA cameras. I picked this one up on eBay. it had a stiff sliding cover, but a partial disassembly and cleaning improved it. It still isn't as smooth as my XA, but much better than it had been. I'm shooting my first roll of Tri-X through it now. I'm doing some comparison shots with my XA, so we'll be able to see the difference in each camera's field of view.

    The XA4 does not have a rangefinder like the XA, but uses a zone focus system with 7 settings (1 ft, 1.7ft, 2.3ft, 3.3 ft, 5ft, 10ft, infinity) The wide angle lens allows a much closer focus distance, 1 ft, and the camera strap serves as an aid to focus at 1 ft or 1.7 ft. It does not have the manual aperture settings of the XA. The XA aperture control on the left of the lens is replaced with the focus control on the XA4.


    Wednesday
    Jul312013

    Close-up Photos with the Lomography Belair

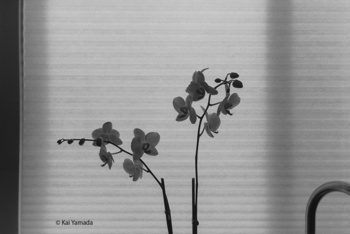
    This is my first attempt at using the Lomography Belair at the limit of it's 90mm lens. I am 1.5m from the flowers in the window. I used a tape measure to accurately place the lens at the correct distance from the flowers. I framed the photo, then slightly tilted the camera up to adjust for parallax (Photo lens is lower than the viewfinder).

    The film was Tri-X 400 and processed in Agfa Rodinol. I am down to my last few bottles of Agfa Rodinol, and am trying out the 1:50 dilution to stretch it out. I usually use a 1:25 dilution.


    Friday
    Apr052013

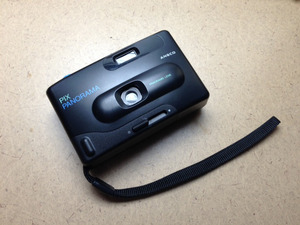
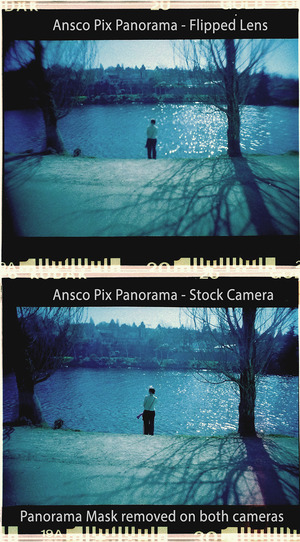
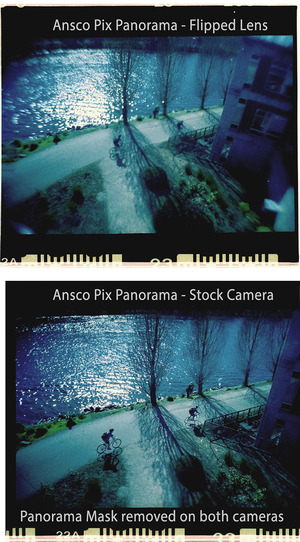
    Camera Mod - Ansco Pix Panorama Flipped Lens camera


    I first became aware of the practice of flipping lens on simple single lensed cameras when I saw samples of a flipped lens Brownie Hawkeye at Flickr.com. The images showed exaggerated blurring and vignetting on the edges. These looked similar to Holga and Diana camera images and I was intrigued.

    I recently saw samples of a flipped lens Ansco Pix Panorama and was inspired to give it a try. When I went looking for my Pix Panorama, I found I had 2. I knew that this was a perfect way of comparing a stock camera to one with a flipped lens.


    These images are clickable for higher res images.

    Would you like to try this yourself? I made a how-to video showing how to flip the lens on the Ansco Pix Panorama and posted it on my youtube channel.

    http://bit.ly/kPixFlip

    Wednesday
    Mar202013

    Lomography Film Scanner or DIY Film Scanner - How to Convert a Negative Image to Positive

    The Lomography Film Scanner is out, but they haven't released their LomoScanner Apps for Android or iPhone yet. If you are trying out some version of a DIY Film Scanner, you also need a to process your negative images to positive. So how do you change and convert the digital images of the negatives to positives?

    One solution is to use the IOS iPhone app Photoshop Express. I have been using this app to convert the images from the DIY 120 film scanner I built. Adobe also makes an Android app with the same name, but I haven't been able to verify if it has the same feature set as the iPhone app. If you know, please drop me a line.

    If you have Photoforge2 on your iPhone, I understand that this will also invert negatives.

    Here's how to do the negative conversion to positive on an iPhone.

    1. Download the Adobe Photoshop Express app. (Free!)

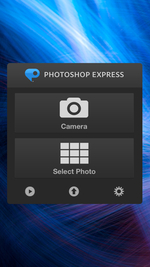
    2. Launch the Photoshop Express app

    3. You can either take a photo of your negative with the Lomography Smartphone Film scanner, or select an image of a negative.

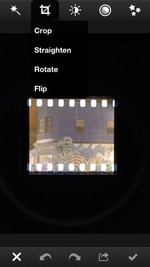
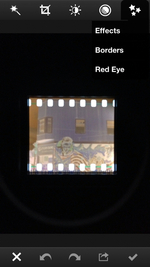
    4. When the image is open, select the crop tool and rotate or straighten the image before cropping. Next crop the image down to the edges.

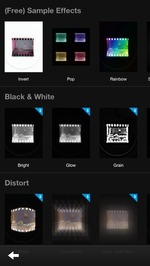
    5. After the image is cropped, go to the effects menu and select "Effects".

    6. Select "Invert" from the special effects menus. (Top left corner of the effects grid)

    7. After the image is inverted, it will be off in color and saturation.

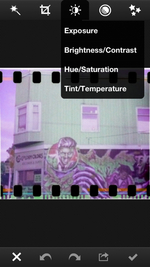
    8. To color correct the image, select Hue/Saturation from the correction menu.

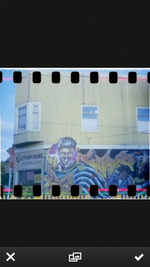
    9. Adjust the Hue/Saturation. For my negative, I needed to adjust the Hue to the mid -60s  and the Saturation to about 10. Your mileage will vary, depending on the negative and film used. You may also need to adjust the exposure in the same menu list as Hue/Saturation to lighten or darken the image.

    10. Done!