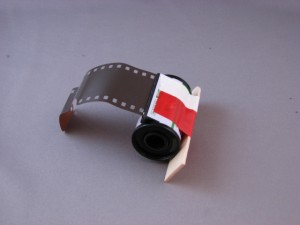
Thrift Store Find: Lomography Fisheye 2
 Monday, June 16, 2014 at 8:02PM
  35mm film,
  Fisheye 2,
  Lomography in
  Thrift Store Find
 contact:
 Monday, June 16, 2014 at 8:02PM
  35mm film,
  Fisheye 2,
  Lomography in
  Thrift Store Find
  Monday, June 29, 2009 at 6:01AM
  120 film,
  35mm film,
  film processing in
  Article,
  Tech Tips
  Wednesday, March 4, 2009 at 1:11AM
Here is my procedure for shooting 35mm film in a Diana (vintage or Lomography Diana+) or Holga. This should work for any camera that has a roll film compartment big enough for a 35mm cassette. I have a few older box brownies and folding cameras that use defunct film sizes that I will try this with.
Unloading the Camera:
Unloading the camera must be done in absolute darkness. If you don't have a film changing bag (you can get one from BH photo video or Freestyle Photos Supply), you can use a dark room. A windowless bathroom is ideal. Throw a towel across the bottom of the door to block out any stray light.
Open the camera.
Remove the 35mm film cassette and rewind the film back into the cassette.
Take the film to a photo lab and get it processed.
Tell them you do not want the negatives cut. Give them your 35mm plastic film container to put the film in when they are done. The reason for this is that the negative frames will be unevenly spaced and you will want to trim them so that they fit in a standard 35mm negative page. (also at BH photo or Freestyle).
You can ask, but they probably won't be able to deal with printing your negatives either, since they will be quite a bit wider than a standard 35mm negative. Even if you are willing to let them crop your image down to a 35mm frame, you will probably also want to include the image around the sprocket holes. Most 1-hour lab equipment won't print these, since it is not part of the normal image area for a 35mm negative.
If you want the entire negative, including the sprocket holes, your best bet is to get a film scanner. If you are on a budget, and most of us are, look at the Epson V500. The Epson 4490 is also a good choice. It is no longer in production, but if you go to the Epson website, they often have refurbished units for sale.
Edit: June 5, 2010
There seems to be some confusion about getting prints from 35mm film shot this way.
If you are looking for a simple way of getting prints out of your 120 film camera by shooting 35mm film, this isn't it.
While 35mm film is easier to get processed, the negatives created by shooting them in a 120 film camera are non-standard. Most 1-hour labs can't make prints, unless you don't mind getting parts of the image cropped out. Even so, they may not want to deal with your DIY 35mm film in making prints. They will have to manually set-up each print, because their automated equipment won't work.
There are labs (usually smaller mom and pop operations or specialty labs.) that can deal with this, but you will have to do the legwork and call or visit them in person to ask.
The best way of getting easy-to-print 35mm images is to use a 35mm lo-fi camera.
 Tuesday, July 15, 2008 at 7:19AM


 35mm film,
  Diana+,
  modification in
  Article,
  Diana Mod,
  Diana camera,
  Film,
Film,  Photo,
  Tech Tips